 Back to Blog Home
From SITE Cloud Object Storage (S3) to your website: bringing bucket assets to the browser
By
Cloud Product Team • 4 min read •January 6, 2026



Introduction
Web applications and websites often need a simple, scalable place to store and serve assets such as images, videos, PDFs, and downloads. Instead of embedding large files directly into your app or managing them on a web server, you can use SITE Cloud Object Storage (S3) as a dedicated repository for these assets and reference them from your website when needed.
In this blog, we’ll assist you as you go from creating a bucket, to uploading and retrieving objects using Postman, and finally to rendering those objects inside a simple HTML page.
What Will You Build?
By the end, you’ll have:
✅ A bucket in SITE Cloud Object Storage (S3)
✅ A Postman setup that can: Upload, List, and delete objects
✅ A website page that displays assets stored in your bucket (images/videos/files)
Prerequisites
If you haven’t created a bucket yet, we provide a step-by-step guide on how to create and configure an Object Storage (S3) bucket in the SITE Cloud portal: Object Storage (S3) Documentation
- An Object Storage (S3) bucket that’s ready and set up in SITE Cloud Portal
- Postman installed and ready to use
- An HTML page ready to update and publish
You’ll also need these details from your SITE Cloud portal bucket page:
- S3 Endpoint URL (example format: https://ry1-s3.cloud.site.sa/<Bucket_Name>)
- Access Key ID and Secret Key
- Read/Write Permission
Step 1: Set up Postman for SITE Cloud S3
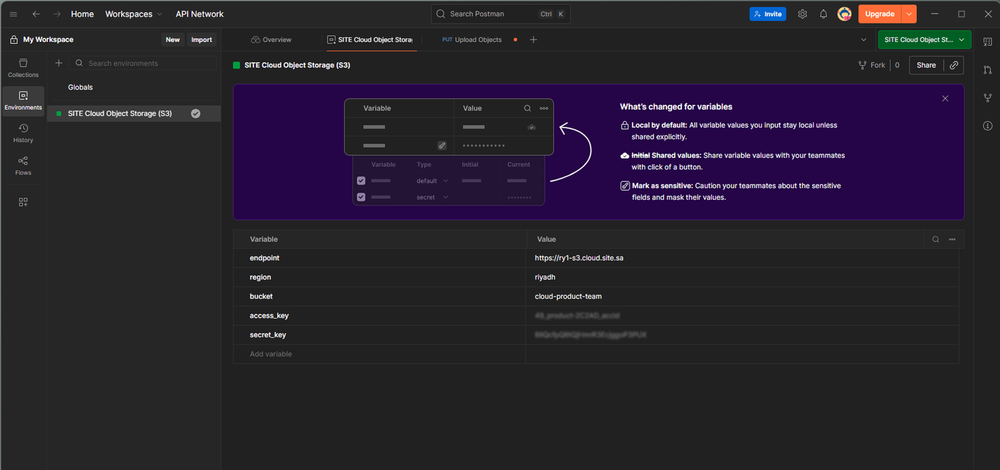
2.1 Create a Postman Environment
We use a Postman Environment so you don’t have to retype your S3 details every time. It keeps the same values for upload, list, and download requests, which helps you avoid mistakes or mismatched settings.
To create an environment add these variables:
- endpoint → https://ry1-s3.cloud.site.sa
- region → riyadh
- bucket → <Your_Bucket_Name>
- access_key → <Your_Access_Key_ID>
2.2 Setting Up Your S3 Requests in Postman
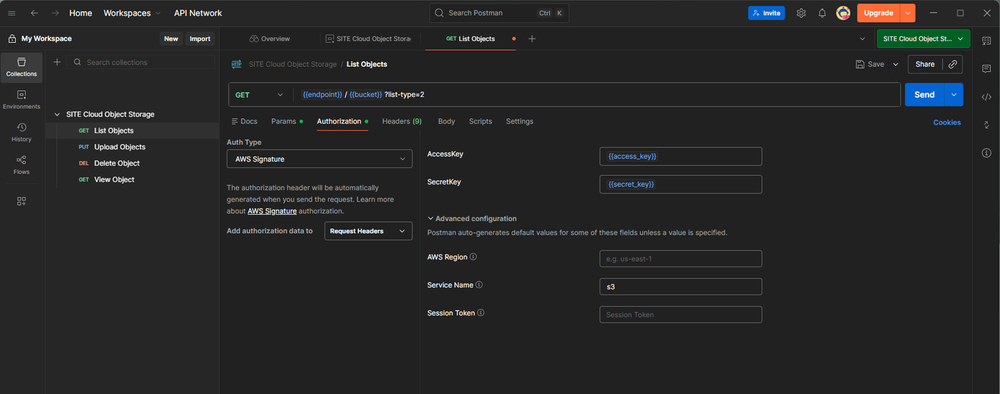
Before you send any of the requests below, make sure Postman is signing them correctly. First, open the request and go to the Authorization tab, set Type to AWS Signature, then fill in the fields using your environment variables:
- AccessKey: {{access_key}}
- SecretKey: {{secret_key}}
- Service Name: s3
2.2.1 Upload a File (PUT)
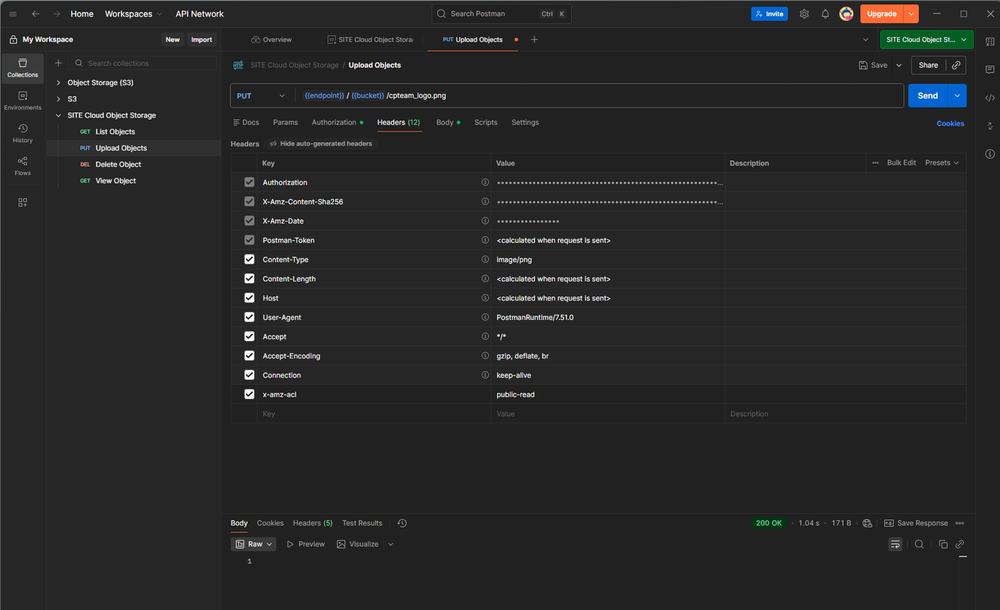
Start by uploading a simple asset, an image like ".png" is perfect because we’ll reuse it later in HTML. In Postman, create a PUT request using your environment variables.
URL:
↳ {{endpoint}}/{{bucket}}/<Object_Key>
Header:
↳ Content-Type: image/png (adjust based on your file type)
↳ x-amz-acl: public-read (to make the uploaded object publicly readable)
Body:
↳ Choose binary, then select your local file (e.g., logo.png)
If everything is set correctly, you should get a success response (often 200 OK or 204 No Content), and the object will now be stored in your bucket.
2.2.2 List Objects in the Bucket (GET)
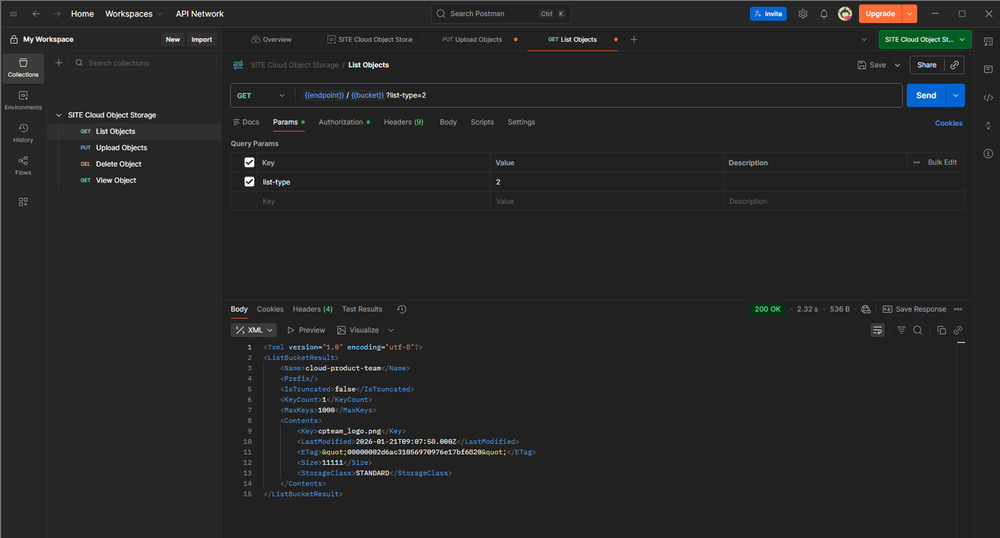
After uploading, the fastest way to confirm everything is working is to list your bucket contents. In Postman, create a GET request using your environment variables.
URL:
↳ {{endpoint}}/{{bucket}}?list-type=2
2.2.3 Tip: Optional View & Clean-Up (GET + DELETE)
If you want extra verification (outside the main aim of this blog), you can retrieve the uploaded object or delete it after testing:
• GET (View/Download): {{endpoint}}/{{bucket}}/<Object_Key>
Returns 200 OK with the object content (use Save Response for binary files).
• DELETE (Clean up): {{endpoint}}/{{bucket}}/<Object_Key>
Typically returns 204 No Content (or 200 OK). To confirm it’s gone, run your List Objects request again and make sure the key no longer appears.
Step 2: Display Your Bucket Asset in Your Website (HTML)
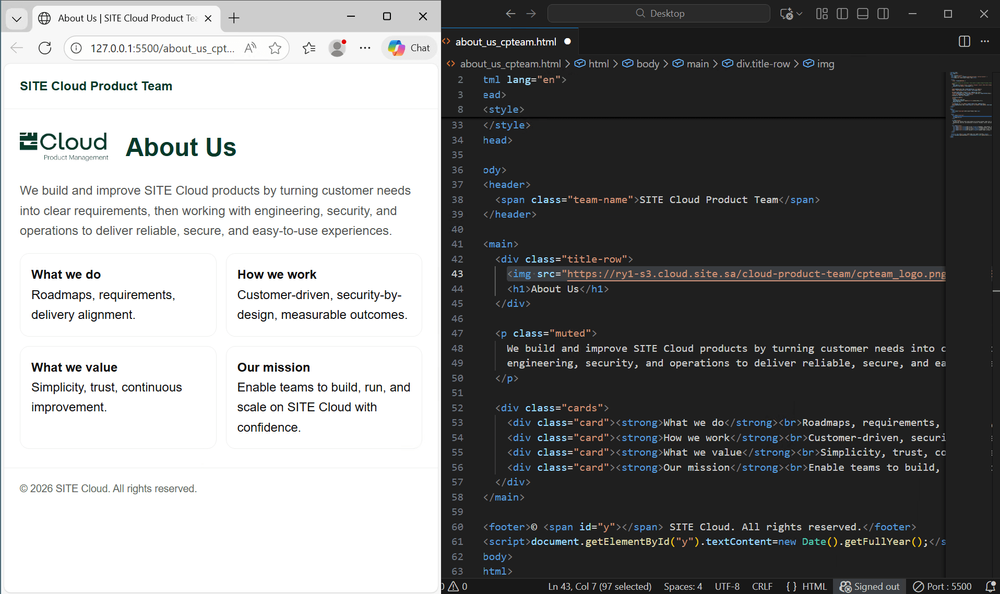
By inserting the following tag into your HTML code, your page will fetch the logo directly from your SITE Cloud S3 bucket (instead of looking for a local file on the server), so when you open the website, the logo will appear in the browser.
<img src="https://ry1-s3.cloud.site.sa/<Your_Bucket_Name>/<Object_Key>" alt="xx logo">
Wrap-up
You now have a full end-to-end workflow: create a bucket (via Object Storage (S3) Documentation), use Postman to upload, list, and retrieve objects, and display bucket assets in your website using direct URLs (public). Next, you can extend this by building a simple gallery page that lists and renders multiple objects, adding caching headers for faster load times, or integrating your SITE Cloud CDN for better performance.